Pricking tool
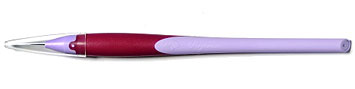
We recommend the parchment craft single needle tool made by Pergamano, illustrated above (Code: 10241). They come in two needle thicknesses, regular for making small perforations and bold which has a longer and thicker needle. They may be available from your local craft shop or if not, an Internet search for ‘Pergamano Single Needle Perforating Tool’ should find a supplier, or see our Useful Links page.
Improvised pricking tool
![]()
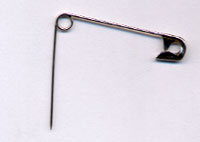 You might be able to improvise a pricking tool from something you already have around your home such as a hat pin or a safety pin.
Pricking mat

Pricking mats are usually made from felt or dense polyurethane foam. The typical size is 22 by 16 centimeters (9 by 6 inches) and 1 centimeter (1/2 inch) thick. Pergamano parchment craft suppliers sell pricking mats.
Improvised pricking mat
If you can not locate a pricking pad in your local craft store then you could make one from layers of thick felt or the type of foam padding used for upholstering furniture. Another possibility is an off-cut from a foam backed carpet. I have heard of people using a mouse mat but I do not think these are thick enough to allow a good penetration of the pricking pin.
Check for missed pricked holes
When I have finished pricking the pattern on to the card I hold the card, with the pattern in place, up to the light. This shows any holes that may have been missed before the pricking pattern is removed.
Pricking several cards together
It is possible to prick a stack of several cards at the same time. This will save time when making more than one card from the same design. We suggest experimenting with scraps of card to see how many you can manage to prick through.
Self-adhesive Tape
Scotch Magic Tape
The thread is attached to the back of your prick and stitch card with self-adhesive tape. I use Scotch Magic Tape, as it is has good archival qualities. The adhesive is less likely to dry out and is less likely to bleed than standard tape.
I cut a number of strips of tape before I start stitching. These can be placed on the edge of a try or similar, ready for use. This saves a delay during stitching when you are ready to start the next thread.
Double Sided Adhesive Tape

Double-sided adhesive tape is ideal for mounting a stitched panel of card onto a blank greetings card or for securing the third panel on a double-fold card. The tape is applied to one of the surfaces to be bonded and then the paper backing removed to reveal the adhesive surface. The two surfaces are then placed together to complete the bond.
How to stop the pricking pattern moving
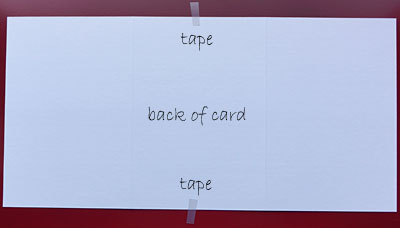
To stop the pricking pattern from moving whilst pricking it out, secure it with two pieces of adhesive tape. These are stuck on the back of the card so the front is not marked. Put the card face down and add strips of tape to the top and bottom edges with half of the tape overhanging. Turn the card face up so the stickey side of the overhanging tape is exposed. Trim the pricking pattern leaving a margin at the top and bottom. Position the pricking pattern and press down to secure with the strips of tape.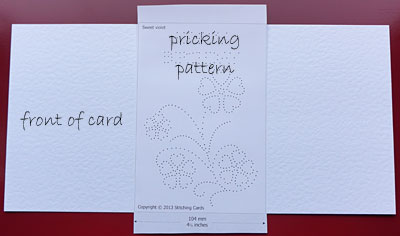
The following alternative pattern fixing method was sent in by Elaine H.
I hold the pricking pattern in position on the card with three or four paper clips. They are easy to position and to move around if necessary whilst pin-pricking the pattern (only move one at a time carefully and the pattern will not shift out of position).
Another pattern fixing method was sent in by Judith Lobato.
Painters tape works well because it is not as sticky as other tapes and peels off easily. (Can be used on the front of the card if testing shows no adhesive is left behing.)
Making the pricked holes less noticeable

Some people think that the holes on prick and stitch cards add to the design and others do not. To make the pricked holes less noticeable place your card face down on a hard surface. Rub gently across the stitch work with the back of a teaspoon. This will flatten the raised edges created when you prick the card and also when you push the needle through to stitch the pattern. Care should be taken not to disturb or stretch the thread. This is not recommended for cards that have beads on for obvious reasons.
Bead storage

It is worth investing in a bead storage box. It is handy to have all your beads in one place and easily accessible. Shops that sell beads will have bead storage boxes in a variety of sizes.
Bead tray

A bead tray with a felt base will keep your beads in one place. There is no fear of them rolling off the edge of the table and getting lost on the floor. The felt stops the beads rolling about so they can be easily skewered with your beading needle.
A teaspoon is good for getting beads from your bead box or packet and also for rounding them up for storage. I find the teaspoon works better on tiny beads than a scoop sold for the purpose. Shops that sell beads will have bead trays.
Protecting your stitch work in the post
Fold your card the wrong way so that the outside becomes the inside. This will protect the stitch work from any rough handling when the envelope goes through the post. This is particularly good if you have any beads or other raised objects on the front since these may otherwise be pushed through the envelope by sorting machines.
The recipient can quickly return the card to normal by refolding it the correct way. However, it is worth putting a note in explaining what you have done as some people may think you have made the card inside out.
Laminate your pattern to extend its life
Laminate your pattern with a standard 6 in x 4 in photo sleeve (approximately 150 mm x 100 mm). It allows you to use the same pattern many times without having to re-print it.
This tip was sent in by Barry Radburn.
Light pencil lines
For a complicated pattern, lightly pencil in the lines. Your thread will cover the marks or they can be erased if needed. This is particularly helpful where the pattern includes human figures such as the surfer in the nautical set.
This tip was sent in by Arlene Buchanan.
Candle wax to lubricate pricking pin
Have an candle on hand and every few pricks put the needle in the wax. It then goes in and out of the card much easier.
This tip was sent in by Christine Bush.
Stitched eye
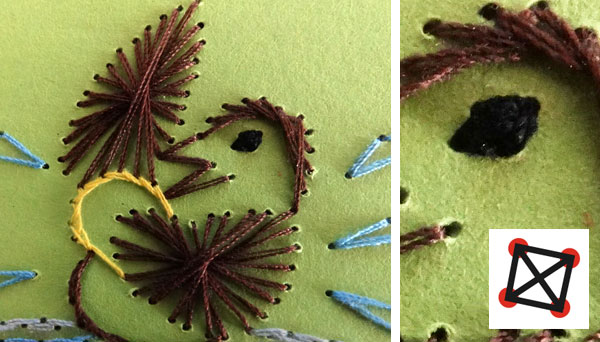
An alternative to drawn eyes is to stitch them. Prick four holes in a square shape. The holes need to be as close as possible to each other. Firstly stitch a cross and then backstitch the outline. The picture of the embroidered eye is from the Stitching Cards Bird Bath pattern.
This tip was sent in by Angelique Vermeul.
See our Useful Links page for equipment and materials suppliers.